GIT Bash: Command line experience
Installation, commands, and deploying your 1st repo in GitHub.


By the end of this blog you would be able to :
- Install Git in your system.
- Learn basic commands to use in Git.
- Set up your first repository and upload files into your Github account.
- Create new branches.
Git Bash is a terminal application for enabling git with the command line in the system. In Git Bash the user interacts with the repository and git elements through commands.
If you want to know what Git is check out the blog I've written on it. Click Here
Installation of Git
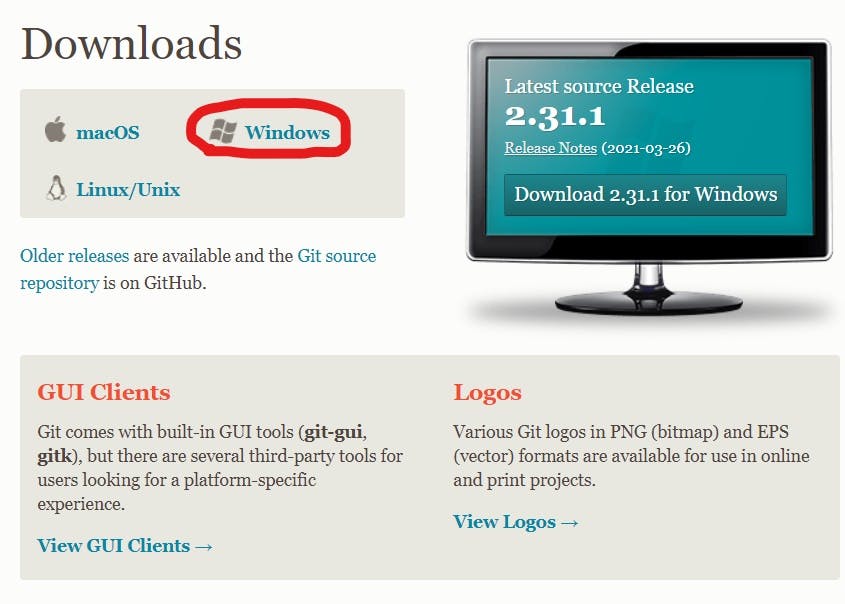
- Click on the above link which will redirect you to the Git website. Below the Downloads click on the type of OS you are using and then the latest version of Git starts downloading.
Open the .exe file and complete the Installation process ( Keep clicking on next on the dialogue boxes and finally it'll install)
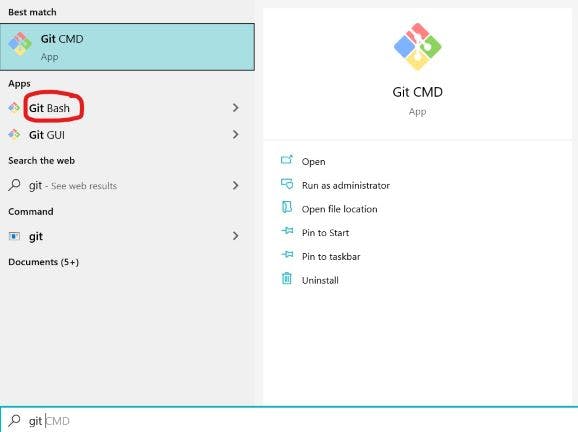
Now search for git bash in your system
Git Bash looks like any other command-line terminals (boring). To use this it's better to know some basic Linux commands. If you're not familiar with it, have a look at the blog I've written on Linux. Click Here
Set your username:
git config --global user.name "first_name last_name"
Set your email address:
git config --global user.email "xyz@example.com"
Initializing a Local repository
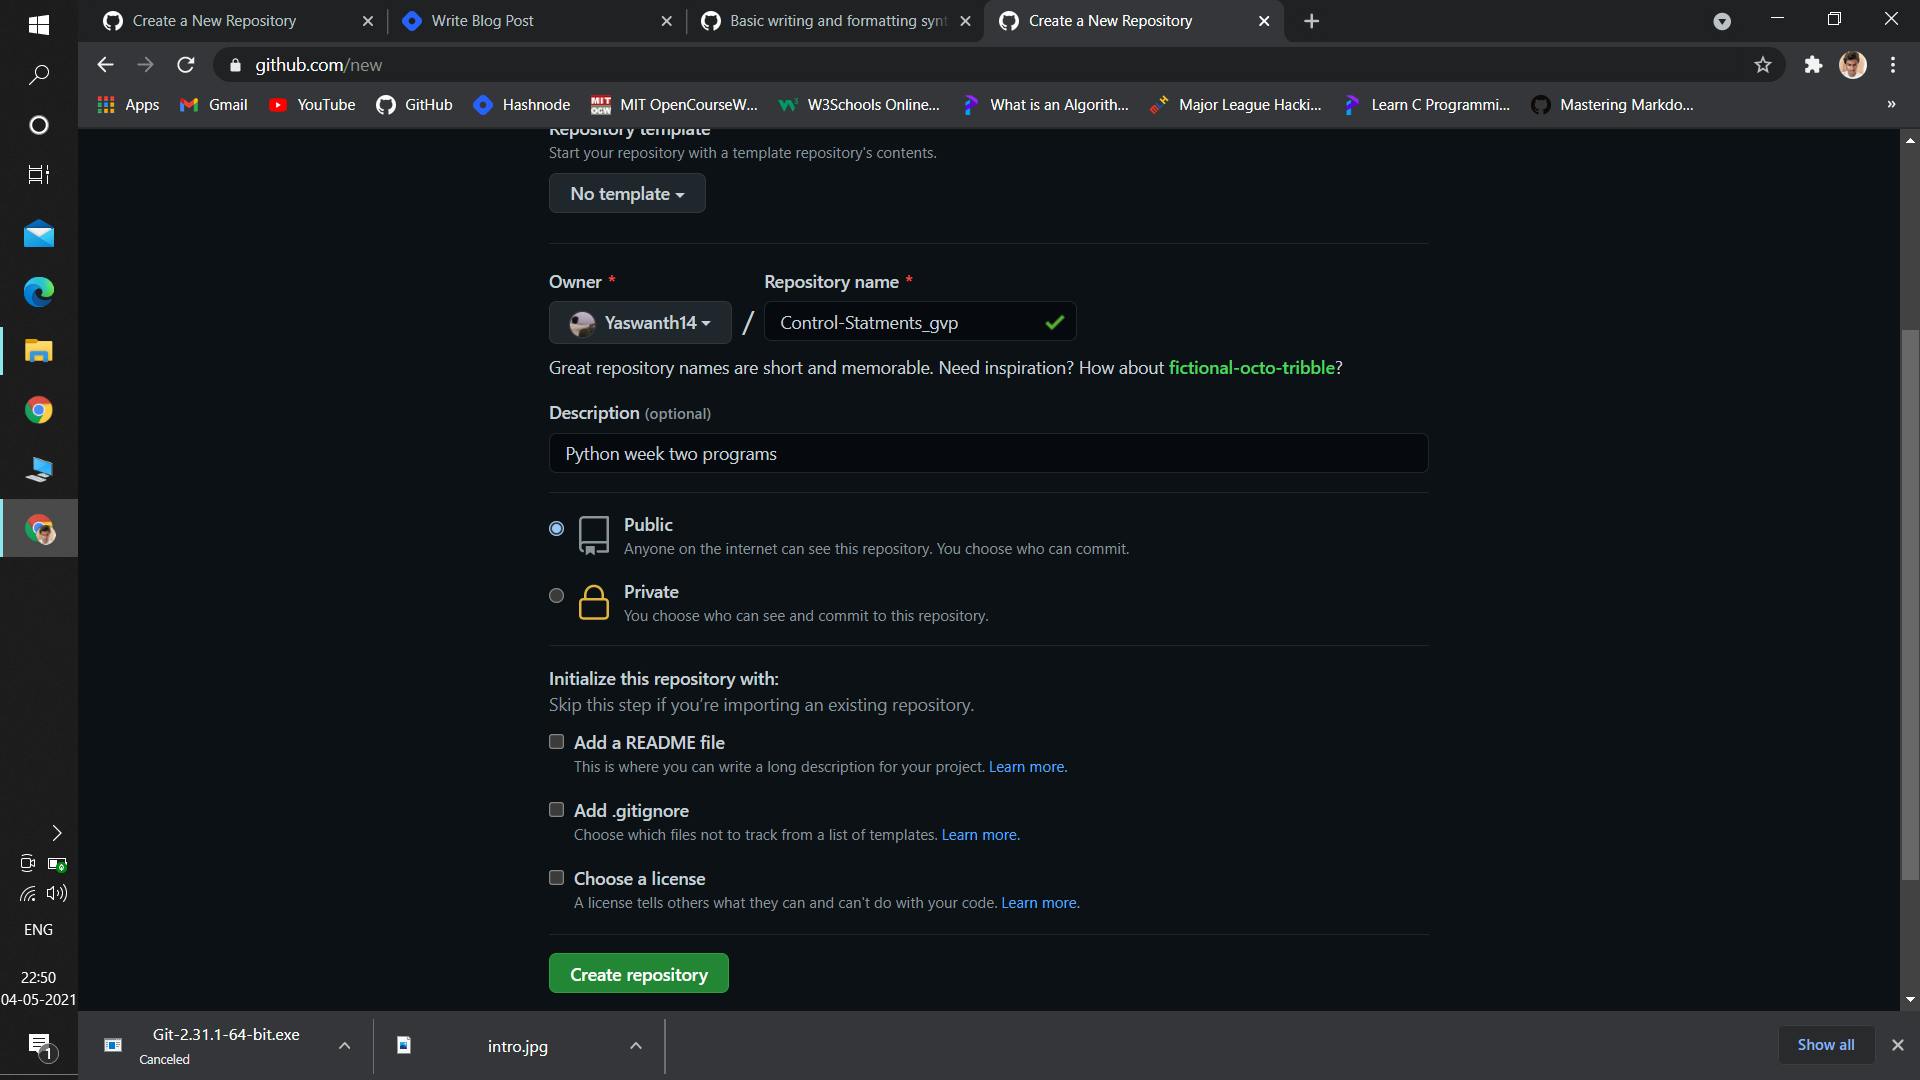
Step-1: Go to Github and click on create a new repository.
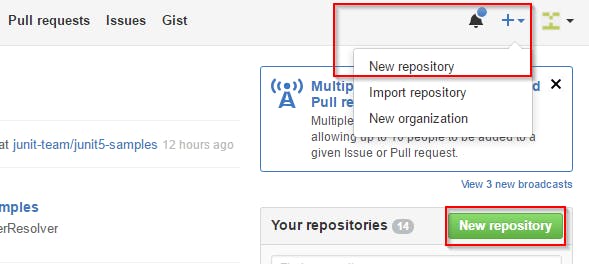
Step-2: Give the name of your choice to your repo and click on create repository.
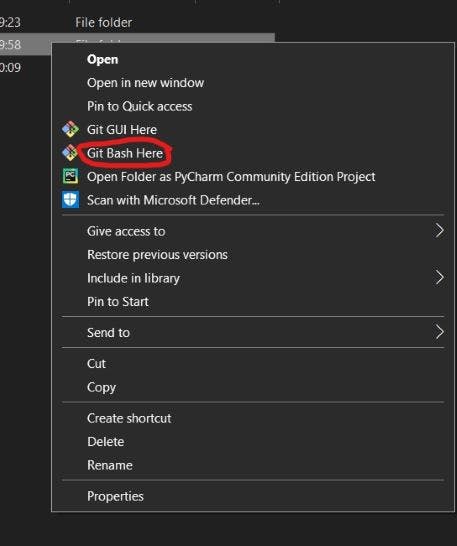
Step-3: Go to your project file right-click and select "git bash here".
Step-4: Initialize the local directory as a Git repository. (This creates a hidden file .git in your directory)
git init
Step-5: Stage the files by adding them to your local repo.
git add .
# This adds all the files present in the directory
# to add specific files use "git add [filename]"
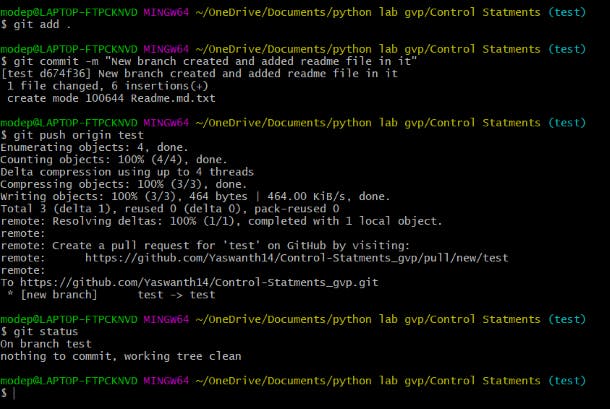
Step-6: Use "git status" to see the staged files.
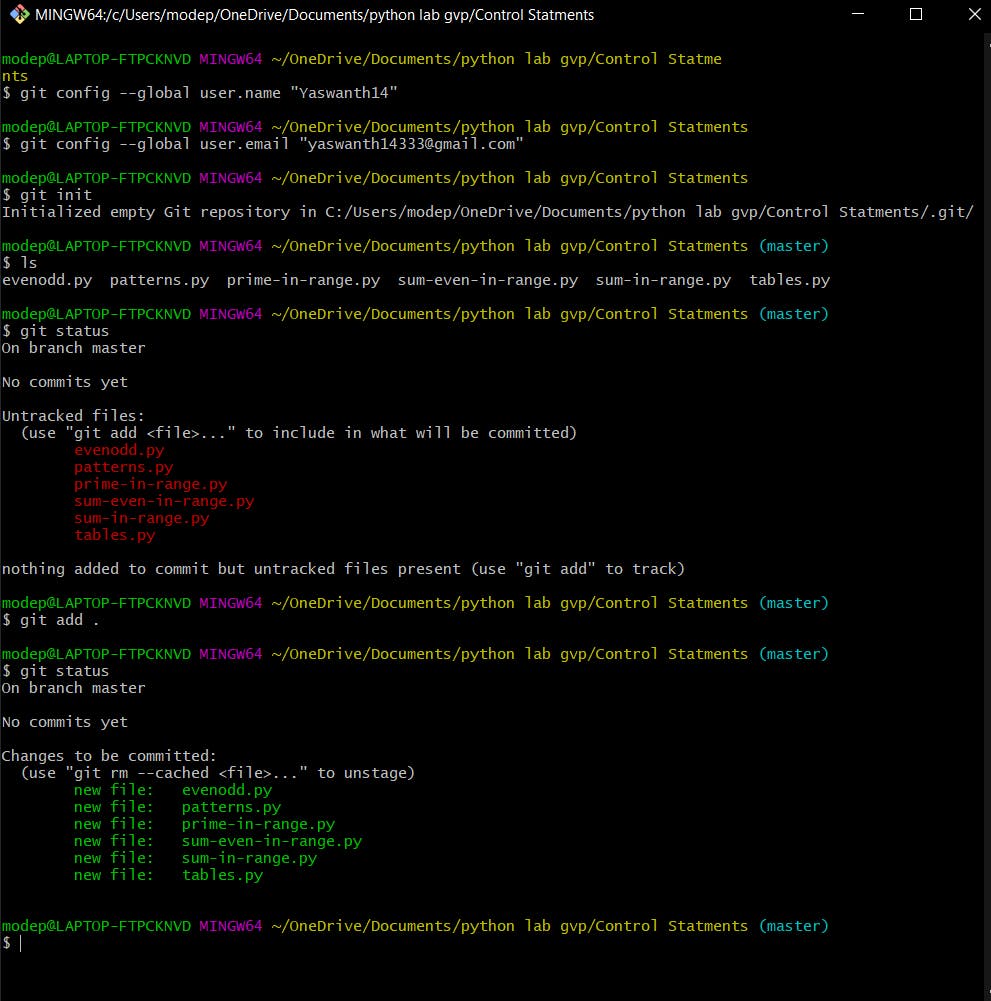
Keenly observe the image, see the message "git status" gave before and after staging.
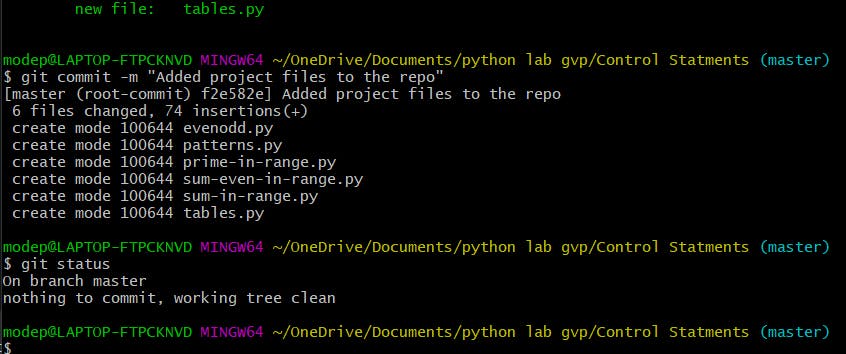
Step-7: Commit the changes you've made with a message.
git commit -m "commit message"
After that use the "git status" again to see that all files are committed.
Till now you've added files in your local repository and now you need to push them to your Git repository.
Push files to Git repository
Step-1: Go to the repo that you created a while back and copy the SSH code (highlighted in the image) of the repository.
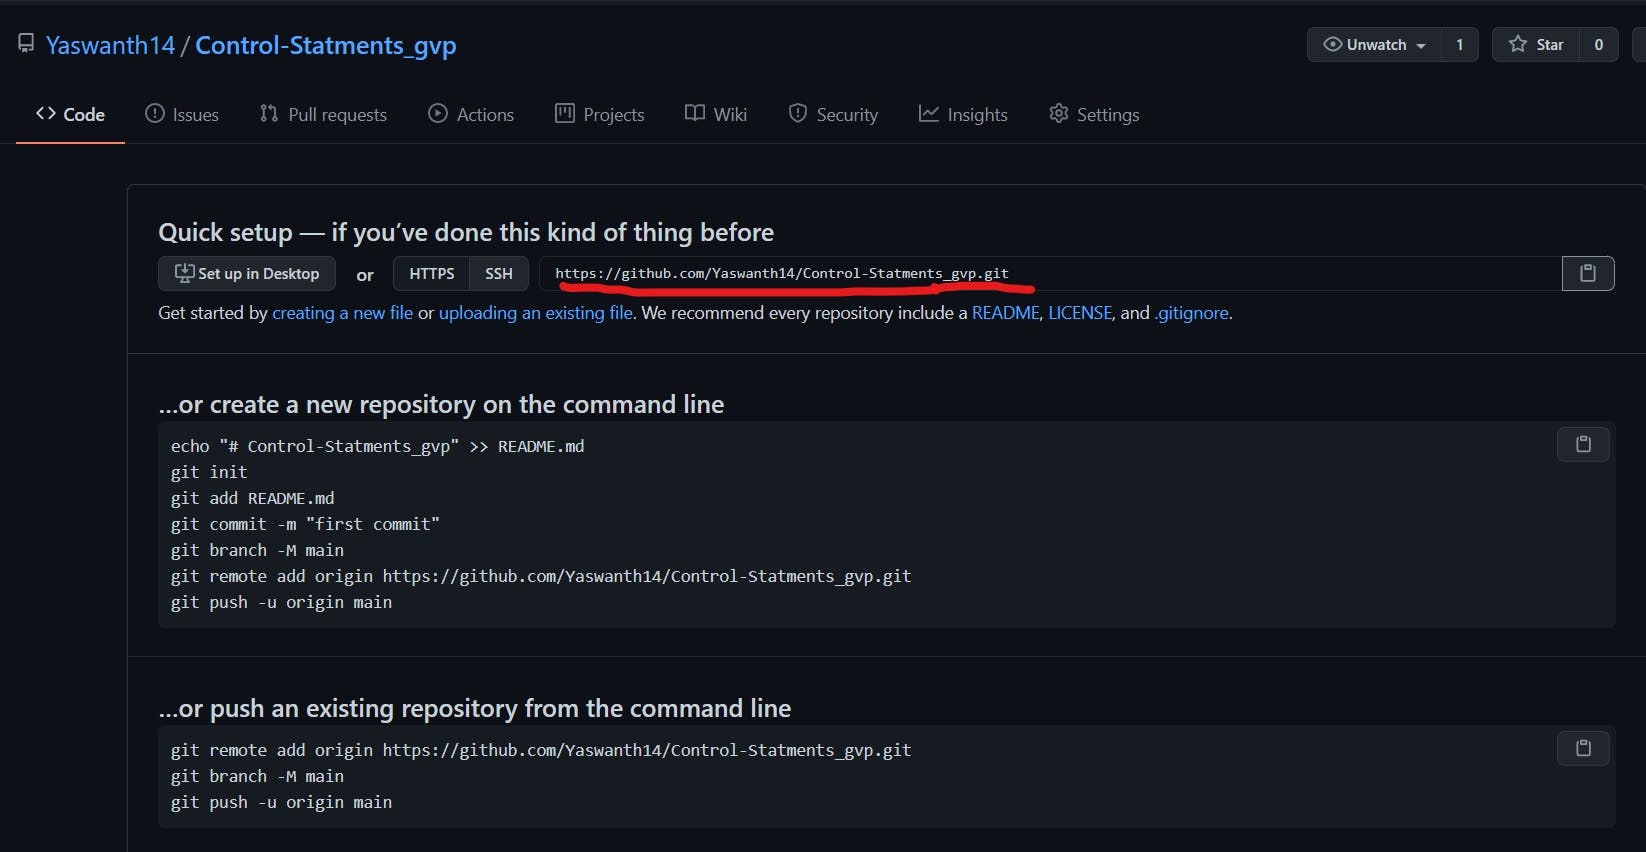
Step-2: In the Git bash give the URL of your repo where your local repository will be pushed.
git remote add origin <repo-URL>
Step-3: Push the changes in your local repo to Github.
git push origin master
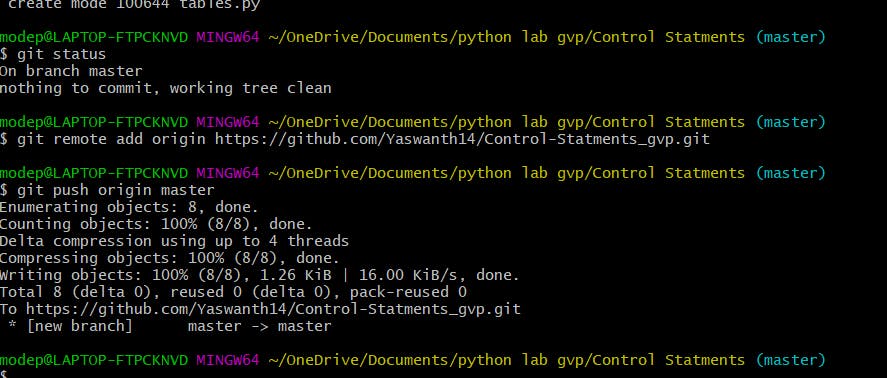
(This may take some time).
If this is your first time Git asks for your login details.
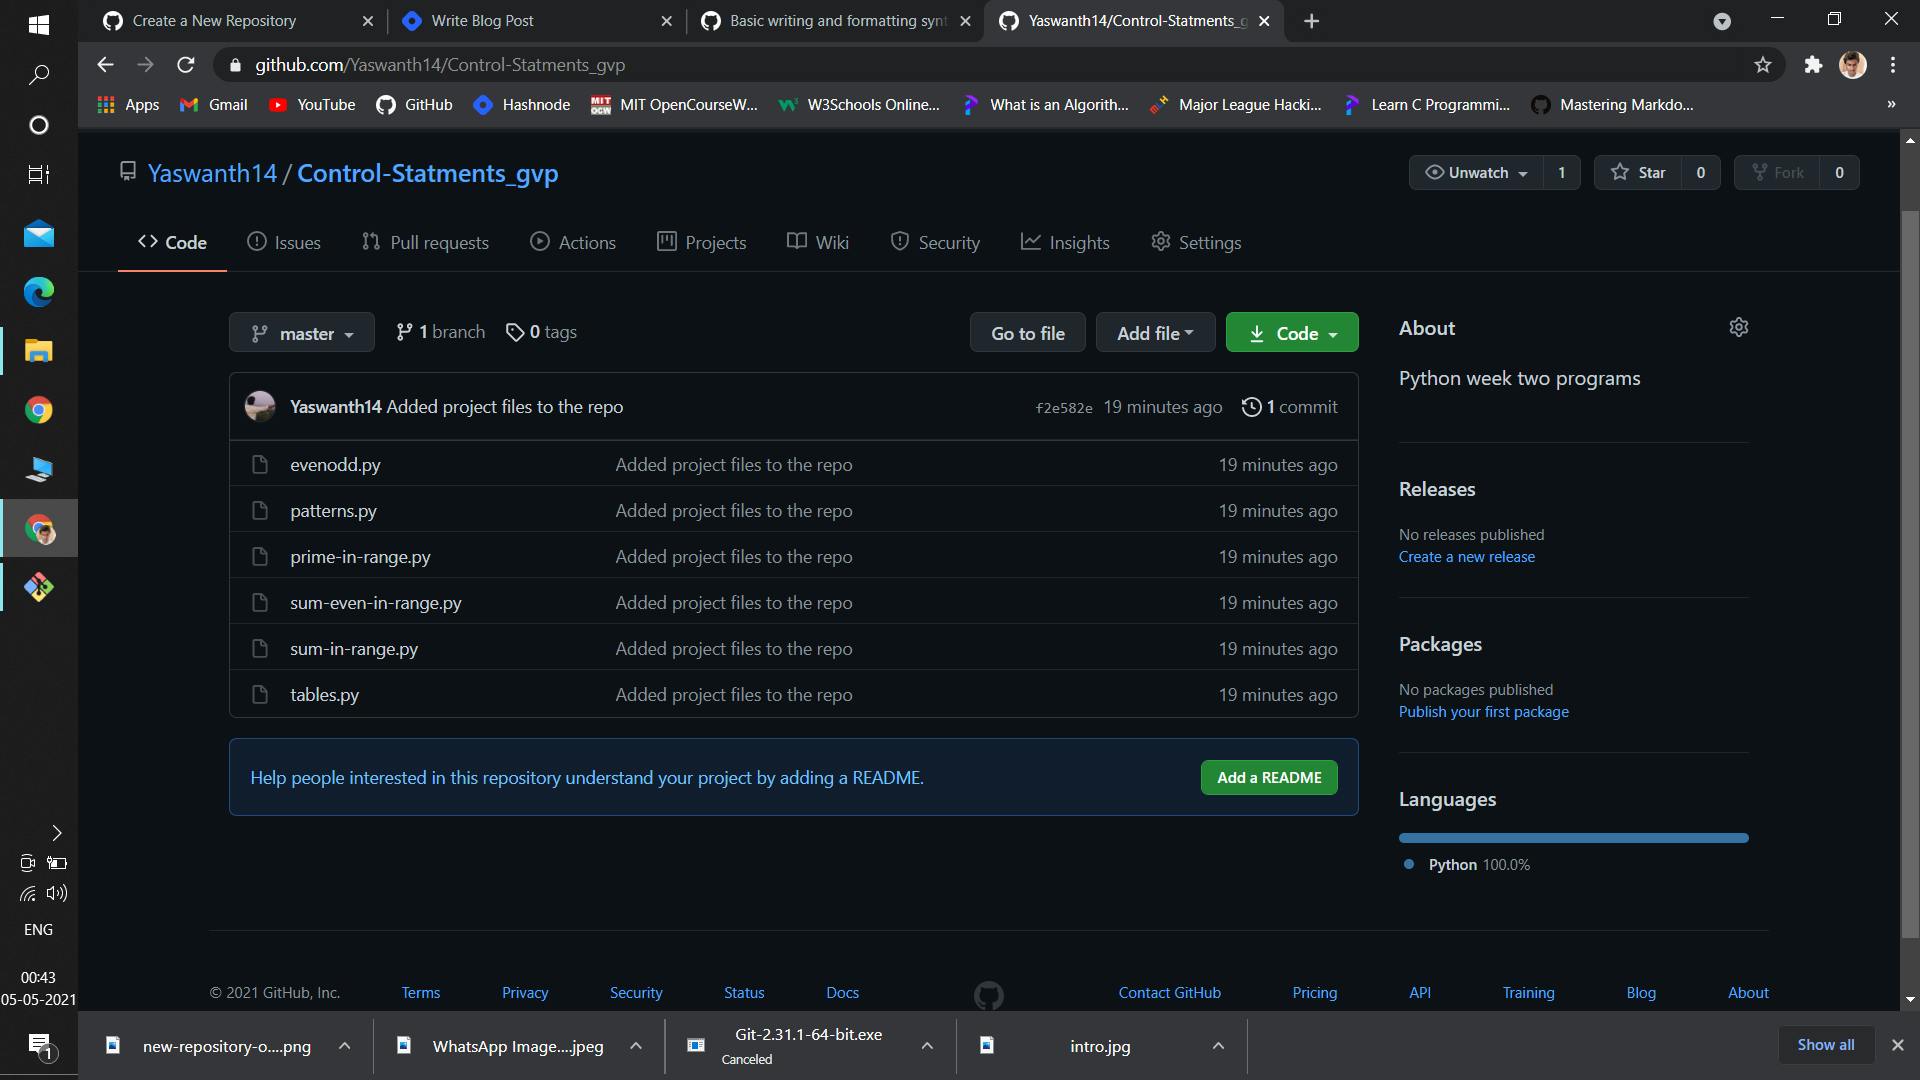
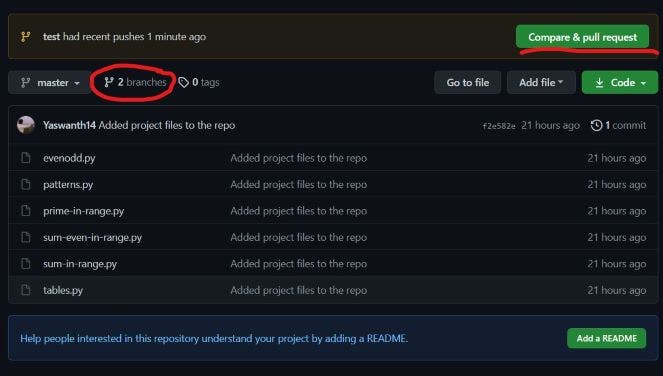
In the above image you can see that all the project files are now added to the Github repo.
Branching through Git Bash
When more people are working on the same project branches come as an excellent aid. Whenever you are unsure of any change that you want to make do it in a different branch to reduce the risk. Try to avoid working on the master branch most of the time.
Syntax:
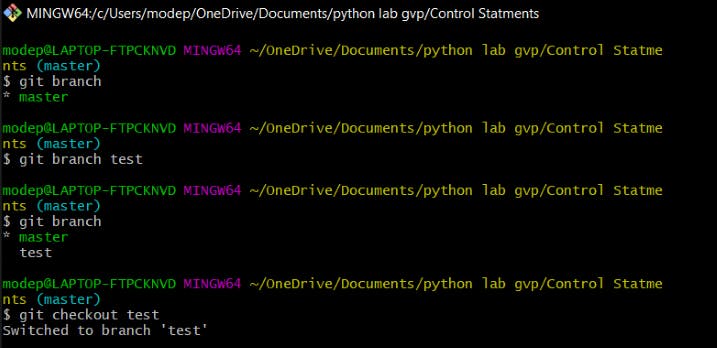
- To list all the branches in your repository.
git branch
- Create a new branch
git branch <branch-name>
- Safe delete a specific branch
git branch -d <branch-name>
- Force delete a specific branch
git branch -D <branch-name>
- To create a new branch and switch no it
git checkout -b new <branch-name>
- To switch to an existing branch
git checkout <branch-name>
After switching to a branch, you can everything that we could do in the master branch, like the staging and committing.
After pushing the branch you can find it in your Github repository.
Merging two branches
To merge a branch in any other branch:
- Go to the target branch
git checkout <branch-name>
- Merge the branch to the target branch
git merge <new-branch>
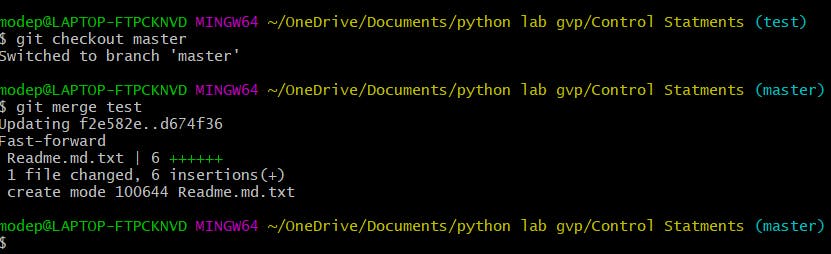
In this way, you can create new branches and merge them...
All these things can even be done with the help of GUI but as a developer using command line is the right way as it is more effective.
Thank You and Happy Learning!